01Safety first
Storm-damaged roofs can be slick, weak or covered in debris. Use proper fall protection, check ladder footing, and watch for downed power lines and damaged decking. Do not go up in high wind, lightning or ice.
If a roof is too steep or unsafe, document from the ground and the ladder, or use a drone where rules allow.
02Start on the ground
Walk the whole property before you climb. Look at gutters, downspouts, window screens, siding, fences, outdoor AC fins, mailboxes and vehicles. Dents and spatter marks help confirm hail fell and show its direction.
Note the date of the storm, and check public storm reports to confirm what happened in the area. Write it down.
- Gutters and downspouts
- Soft metals: vents, flashing, AC fins
- Siding and screens
- Fences and decks
- Storm date and reports
03Look for hail signs on the roof
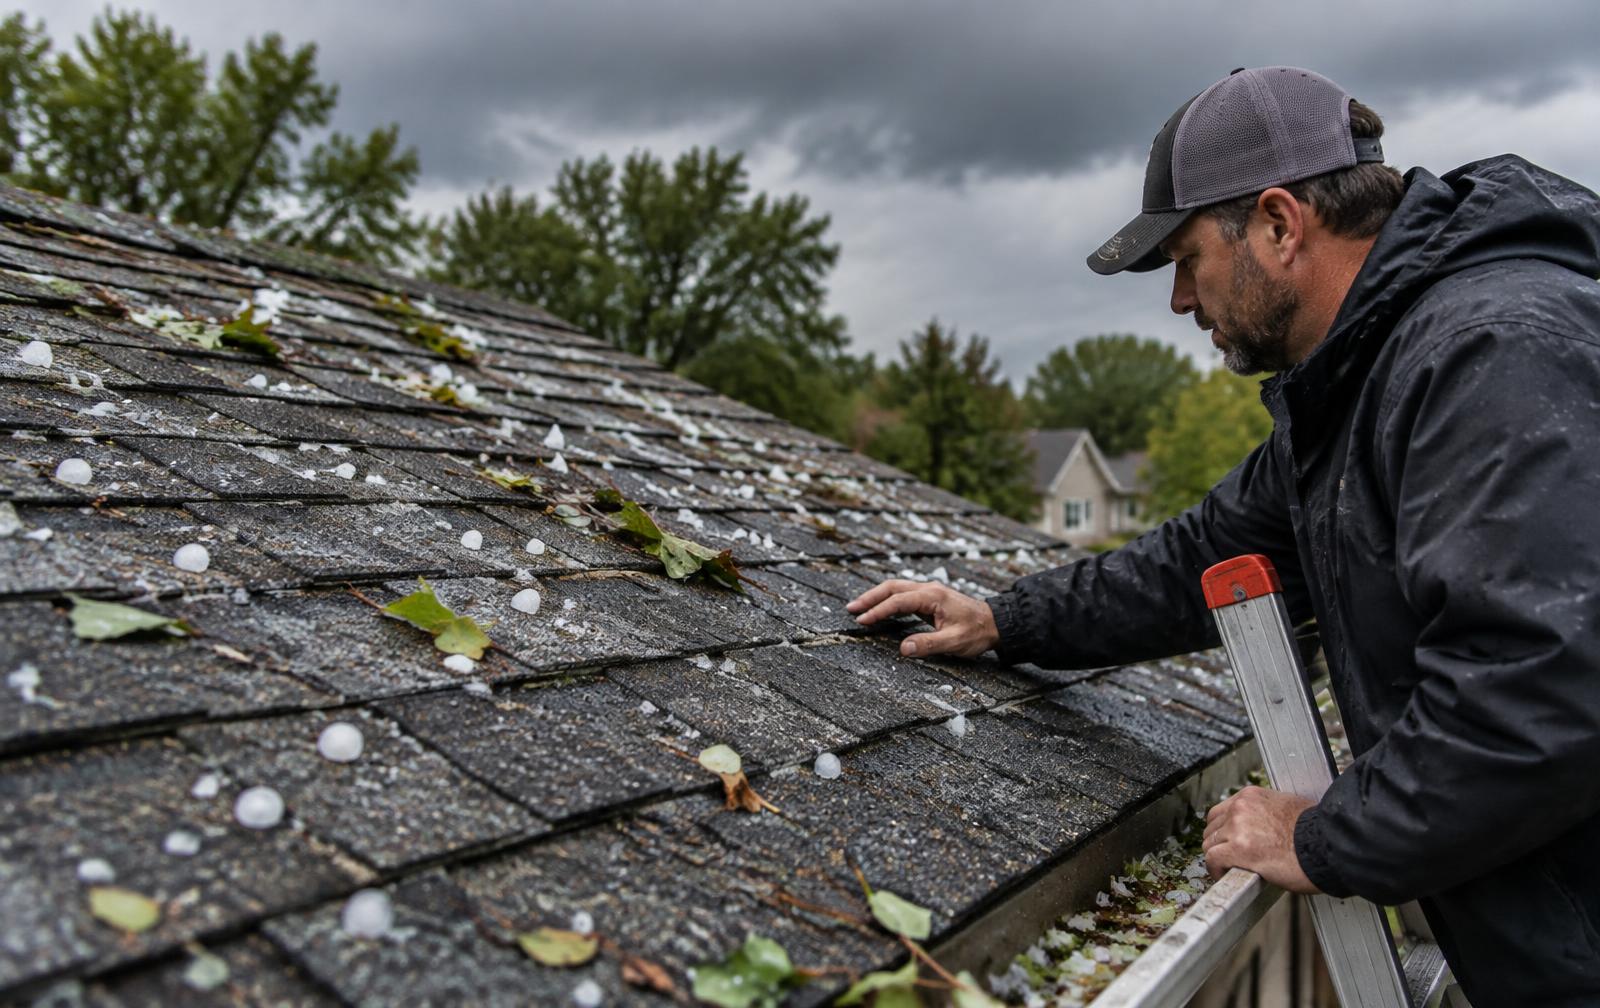
On asphalt shingles, hail can bruise the mat, knock off granules and leave dark, soft spots. Check every slope, since hail often hits harder on the side facing the storm. Look at ridge caps, vents and flashing for dents.
Mark and photograph examples. Many roofers chalk a test square on each slope to show how many hits are present in a set area. Follow the method your local insurers and adjusters expect.
04Look for wind signs
Wind can lift, crease, tear or blow off shingles, especially along edges, ridges and corners. Creased shingles may look flat but have lost their seal. Check for exposed nails and missing pieces.
Look at the attic too, if you can. Daylight, wet decking or fresh stains point to active leaks.
05Separate storm damage from age and wear
Not every problem is storm damage. Granule loss from age, blistering, cracking from heat, poor installation and old repairs are common. Calling wear 'storm damage' is dishonest and can expose you and the homeowner to real trouble.
Be clear in your notes. Point out what is storm-related, what is normal wear, and what you cannot tell for sure.
06Document like it will be reviewed
Take wide shots of each slope, then close-ups of each type of damage with a reference for scale. Photograph soft metals and collateral damage. Keep photos time-stamped and save them to the job file the same day.
Good documentation protects the homeowner, helps the adjuster and protects your company.
- Wide shot of each slope
- Close-ups with scale
- Attic and interior stains
- Collateral damage
- Same-day upload to job file
07Give an honest written summary
Tell the homeowner what you found in plain language, with photos. If you found little or no storm damage, say so. Honesty here builds the reputation that sends you referrals for years.
Explain that the insurer decides coverage. Do not promise a claim will be paid. Follow your state's rules about contractors and insurance claims, including any limits on acting for the homeowner.
08A standard inspection checklist for your team
Give every inspector the same checklist so reports are consistent no matter who goes out. Start with the homeowner's concerns and the date of the storm. Walk the exterior and note collateral damage. Inspect each slope in the same order every time, marking hail and wind signs, then check penetrations, flashing, valleys, ridges and gutters.
If you can access the attic, look for daylight, wet decking, stains and ventilation problems. Finish by noting roof age, layers, material and any pre-existing issues such as poor installation or old repairs. Record what you could not inspect and why, such as a steep slope or unsafe conditions.
A standard checklist does two things. It makes your reports trustworthy to homeowners and adjusters, and it makes training new inspectors much faster.
09Writing the homeowner report
Keep the report short and visual. Start with a one-paragraph summary in plain language: what you found, what it likely means, and what you recommend. Follow with photos grouped by slope or issue, each with a one-line caption. End with next steps, including temporary repairs if there is an active leak.
Separate storm-related findings from age and wear findings so the homeowner understands both. If you are unsure about something, say so. Never overstate damage. A clear, honest report is often the reason a homeowner chooses you even when another roofer quotes lower.
Save the report and photos to the job file and send a copy to the homeowner. If they choose to file a claim, they have clear documentation to share with their insurer.
10Working with adjusters professionally
If a homeowner files a claim and asks you to be present for the adjuster inspection, where your state allows it, be on time, prepared and respectful. Bring your photos and notes, point out what you documented, and listen to the adjuster's view. Disagreements are normal; a calm, documented conversation goes much further than an argument.
Know the limits in your state about what contractors can and cannot do in a claim. Some states restrict contractors from negotiating claims on a homeowner's behalf. When in doubt, check with your state's insurance department or an attorney.
11Temporary repairs and leak protection
If you find an active leak or exposed decking, offer a temporary repair such as tarping to prevent more damage, and document it with before and after photos. Explain clearly what the temporary repair does and that it is not a permanent fix.
Many insurance policies expect homeowners to take reasonable steps to prevent further damage. A prompt, documented temporary repair helps the homeowner and shows your company acts responsibly.
12Training new inspectors
Have new inspectors shadow an experienced inspector on several storm jobs, then do inspections while being shadowed. Review their photos and reports together. Pay attention to whether they can tell hail bruising from blistering and normal granule loss, and whether they document consistently.
Regular review keeps your whole team sharp and keeps your reports honest, which is the reputation you want in every storm market.
13Tools every storm inspector should carry
A good inspection kit makes the process faster and more consistent. Most inspectors carry a sturdy ladder with stabilizer, fall protection gear, chalk, a tape measure, a pitch gauge, a flashlight for attic checks, a moisture meter if you use one, and a phone or tablet with plenty of storage and a charged backup battery.
Add a simple scale reference for photos, such as a coin or a marked card, so close-ups show the size of hits clearly. Keep tarps and fasteners in the truck for emergency temporary repairs. Check the kit before every storm season so nothing is missing when the calls start.
- Ladder, stabilizer and fall protection
- Chalk, tape and pitch gauge
- Flashlight for attic checks
- Phone with storage and backup battery
- Scale reference for photos
- Tarps and fasteners
14Collateral damage tells the story
Collateral damage is damage to things around the roof, like gutters, downspouts, window screens, AC units, siding and fences. It is useful because it shows hail size and direction and helps confirm the storm actually reached the property.
Photograph collateral damage with a scale reference and note which side of the house it is on. When roof damage and collateral damage line up in size and direction, your report is much easier for an adjuster to understand.
15Following up after the inspection
Many homeowners are not ready to decide the day of the inspection. They may want to talk to their family, call their insurer or get another opinion. Set a clear next step before you leave, such as a follow-up call in two days, and put it in your lead list.
Keep follow-up helpful, not pushy. Send the report, answer questions, and check in when you said you would. Homeowners remember the roofer who was calm, clear and honest, and they recommend that roofer to their neighbors.
16What a missed lead really costs
A missed call is not just one lost job. It is the marketing money you spent to make the phone ring, the referral that job would have produced, and the review that would have helped you win the next one. When owners add those up, the true cost of a slow callback is usually much higher than they expected.
Use the calculator on this page with your own numbers. Enter how many calls and forms you get, how many slip through, your close rate and your average job. The result shows sales you never got the chance to quote. Then pick one change, like a shared lead list or an after-hours text, and measure the difference next month.
17Track results after every storm
After each storm season, look back at your inspections. How many found real storm damage? How many became jobs? Which inspectors wrote the clearest reports? Which lead sources sent homeowners who were actually affected? These answers show where to spend time and money next season. They also help you coach inspectors and keep reports honest and consistent across your whole team.
18Photo standards that hold up
Good photos are the backbone of any storm assessment. Set clear standards for your team so every inspection looks the same. Shoot each elevation of the house from the ground first, then each roof slope wide enough to show the whole plane. Follow with close-ups of every type of damage you found.
Use a scale reference in close-ups and keep the camera steady and in focus. Avoid heavy filters or edits. Make sure the photos carry the correct date and time. Name or tag photos by slope and issue so anyone reviewing the file can follow them.
Upload photos to the job file the same day. Photos sitting on a phone can be lost, and a complete, organized file is far more convincing to a homeowner or adjuster than a pile of random images sent by text.
Finally, photograph what is not damaged too. Showing clean areas makes your report more credible, because it proves you looked at the whole roof and did not only pick the worst spots.
19Be the roofer they call first next time
Storm work comes in waves. The roofers who do well have a steady way to be found when homeowners start searching. A rented territory from Rent Roofing Sites sends calls and forms from a local roofing site in your area to you alone. We do not promise storm volume or rankings; terms are in your written agreement.
During a storm rush, missed calls are expensive. Use the calculator to see what slow callbacks cost.